We spend a lot of time in our bedroom (or dorm room). Particularly during winter months, when it is too cold to go outside and we’re too busy with school work to leave our homes.
Since we spend so much time indoors, it is important that we enjoy the sight of our rooms, right? I know I feel happier when my favourite things are decorating my habitat than when I’m just staring at blank, hospital-esque white walls.
This week is Joy at UofT, and at least in my experience, crafts and painting are a great way to relax and focus on expressing creativity—so I’m going to provide a (kinda) step-by-step guide for an easy and fun little art piece I turn to when I need a splash of color in my life.
Disclaimer, I’m not an expert on arts OR crafts. I did take art in high school but so did everyone. I just love crafts. I’m actually three toddlers stacked on top of each other in a trench coat.
Essentially I’m going to be making four paper panels with different designs, you can either choose one of the patterns I display or make your own!
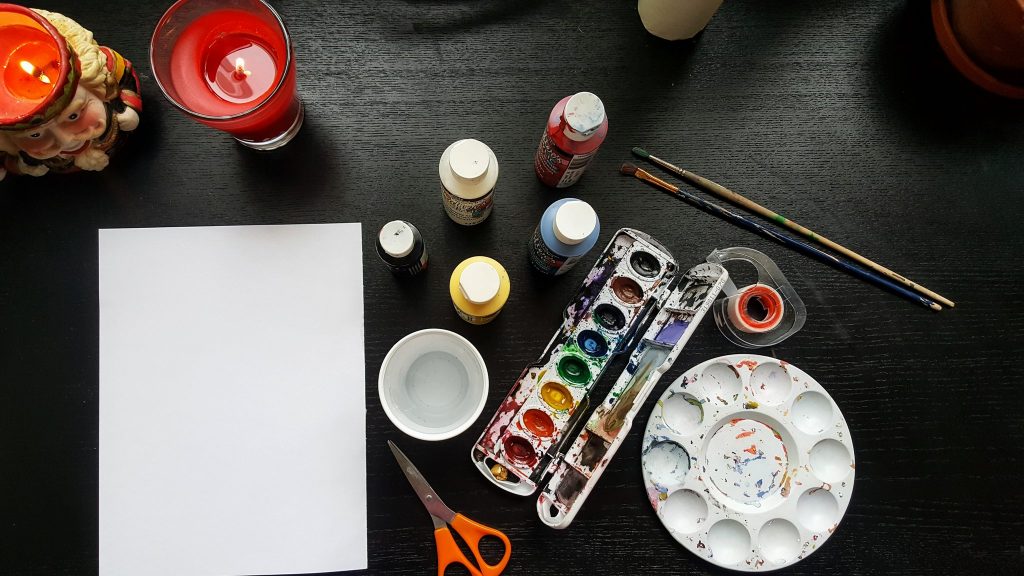
YOU WILL NEED: a sheet of thick white paper, paint, paint brushes, a cup of water (for cleaning paint brushes), scissors, tape (a weak tape, one that would come away from paper easily), and a surface you can possibly get paint on—an old newspaper would do.
You can use acrylic or watercolor, I'll be using five $1.50 bottles of paint: red, yellow, blue, white, and black,
The paint can be replaced by pencil crayons if you don’t have any on hand, but I’m going to be using paint in this example because I find it easier to mix colors and test out combinations that way. They sell bottles of acrylic at dollar stores for about $1.50 each, that’s what I will be using.
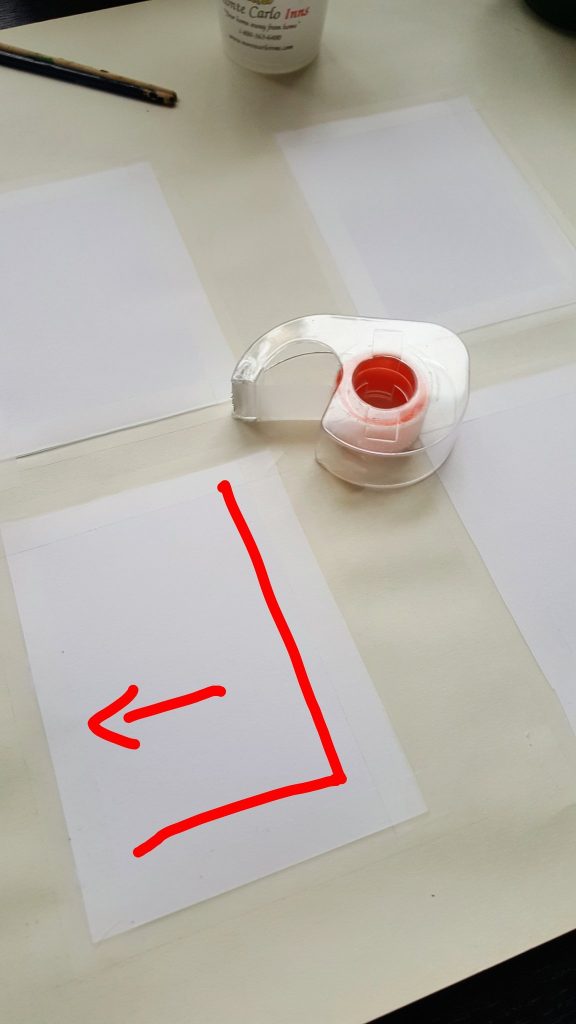
FIRST: Fold the sheet of paper evenly in four, then cut along the fold lines so that you now have four panels, all the same size.
SECOND: Tape the panels down to your surface in such a way that the tape covers a portion of the paper evenly on all four sides.
You can't really see because I've used clear tape, but it overlaps the paper evenly on all four sides
THIRD: Get out your paints and decide on a color palette- or just wing it! I’m going to give instructions for four different kinds of designs you could go for with your panels. There’s the possibility of choosing one design for all four panels and adjusting the colors and variety, or doing all four but in different colors, or doing it exactly as I do, or just creating your own original design with my instructions in mind- the possibilities are endless! That’s why I love this craft.
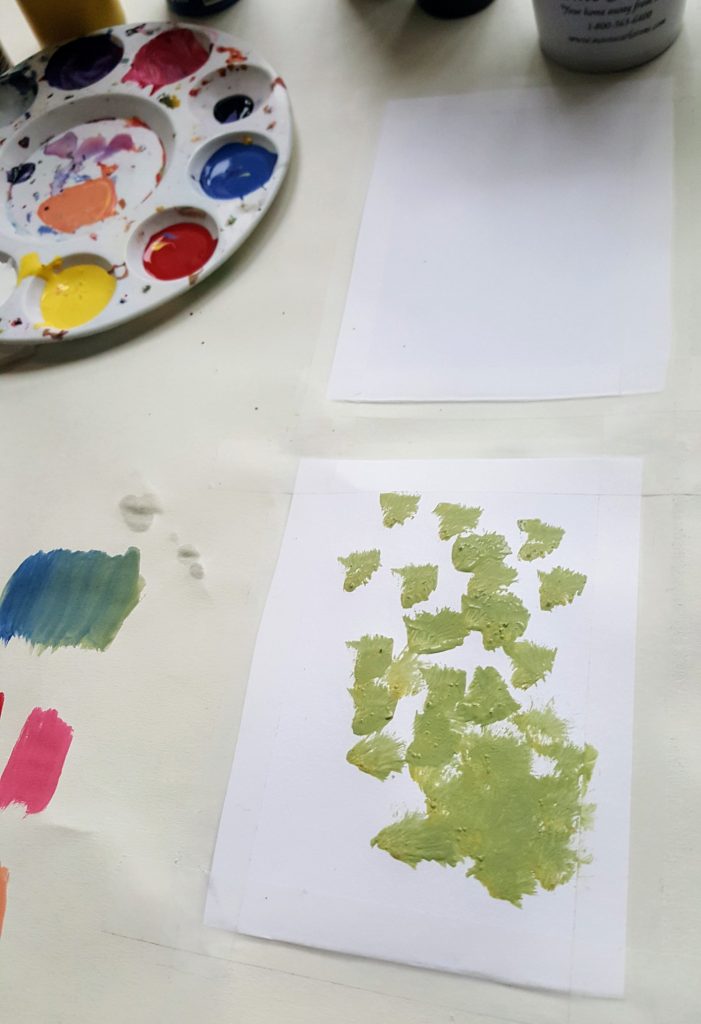
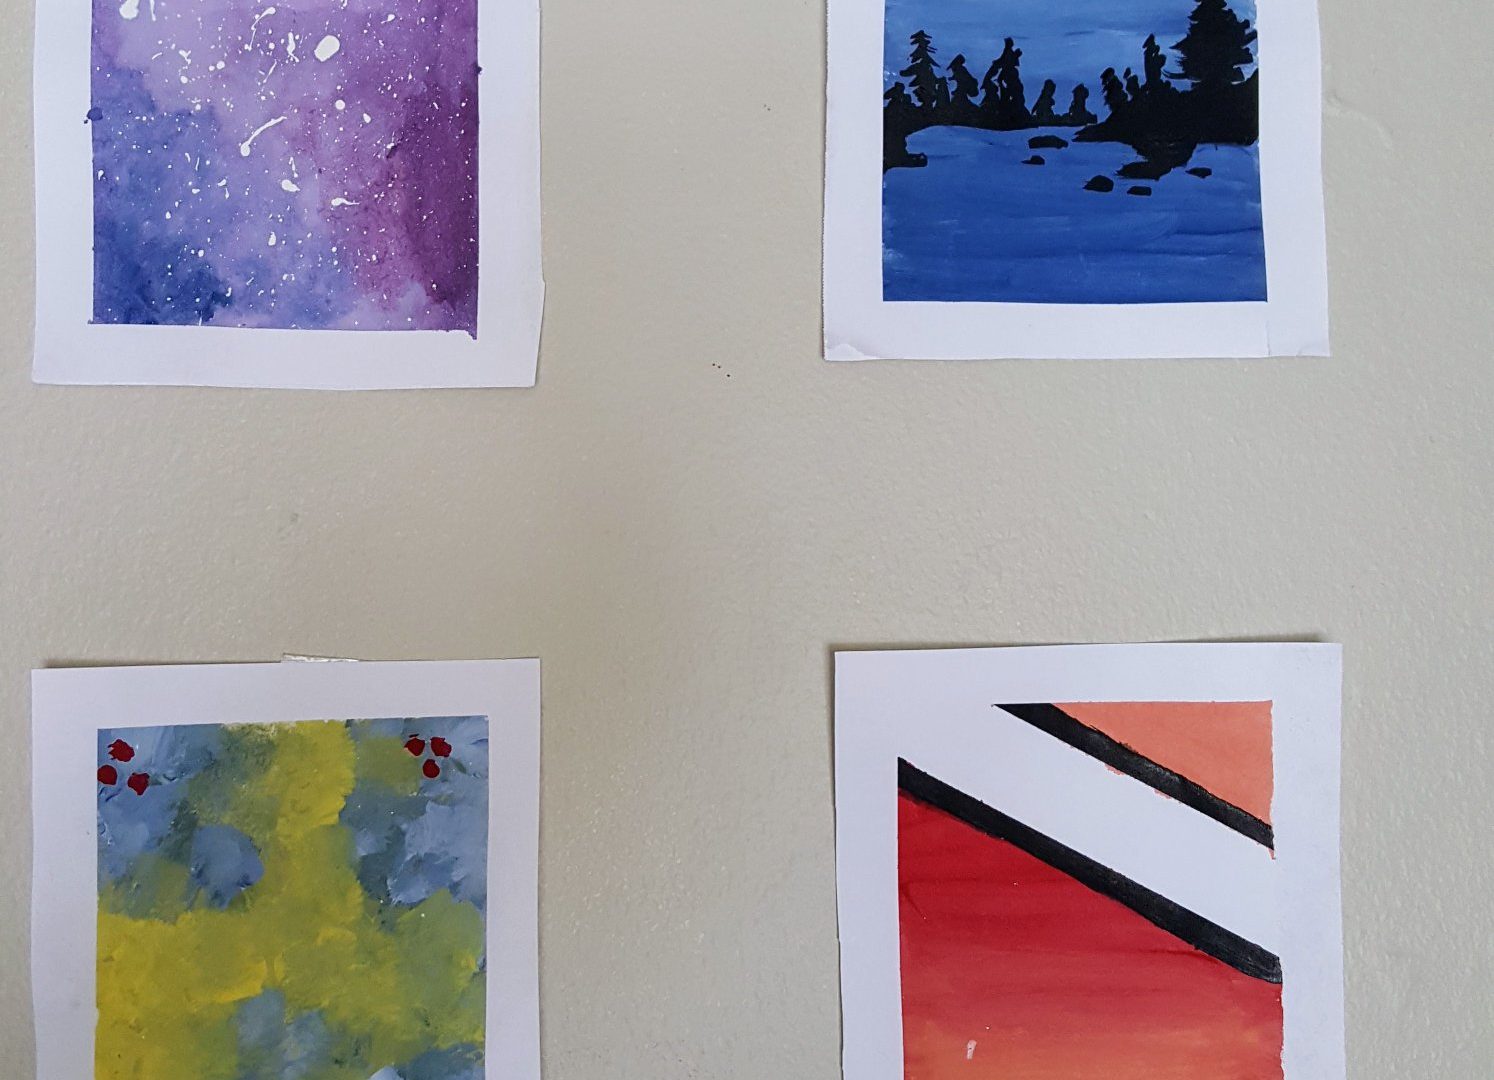
PANEL DESIGN ONE: I chose three colors that are adjacent on the color wheel (yellow, green, blue). Then used the flat side of my brush to cover the paper in splotches of each color, blending them where they intersected- this creates a kind of fuzzy texture.
The best thing about this craft is how abstract it is, so I don't feel pressured to make it look amazing
I also experimented with different shades of the darkest colour- blue- to add detail. Then I chose a fourth color that was a sharp contrast (red) and put small clusters of dots in the corners.
Here's my finished product! If I were to make all four panels this style I would probably do the other ones with other shades of green and blue
There are other ways to use texture with paint if you experiment with it, I find the process quite relaxing.
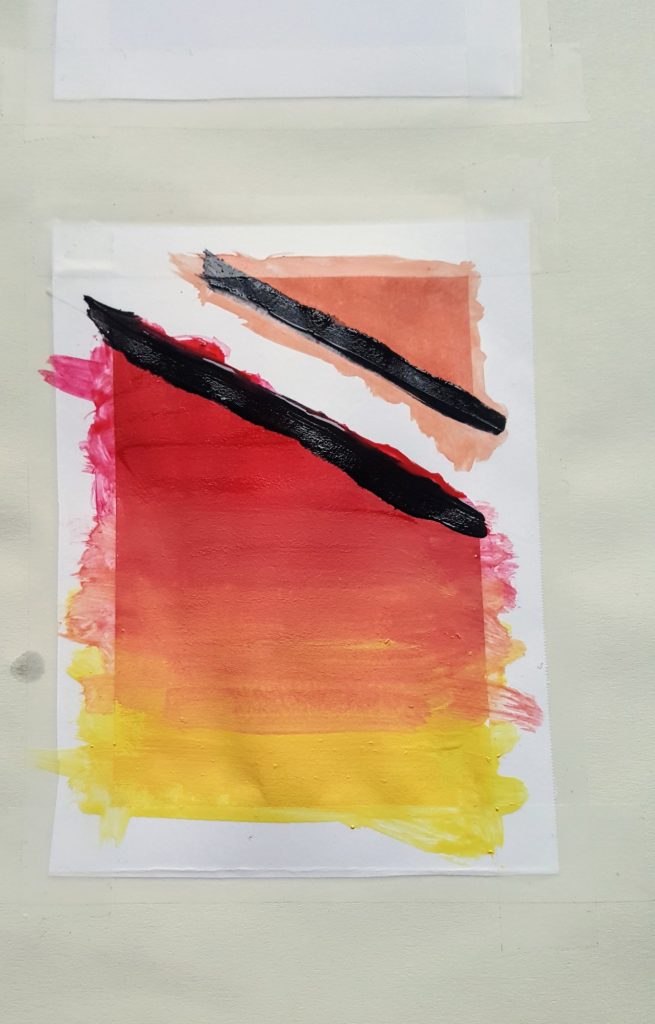
PANEL DESIGN TWO: Geometric shapes! With this one I placed some tape across the middle of my paper to create a hard edge for a white rectangle and orange triangle. Then I made two black lines alongside the tape for contrast, and filled in the rest of the panel with colors I thought would look nice with the design.
Looking back on it now, I wish I'd added more tape and different shapes.
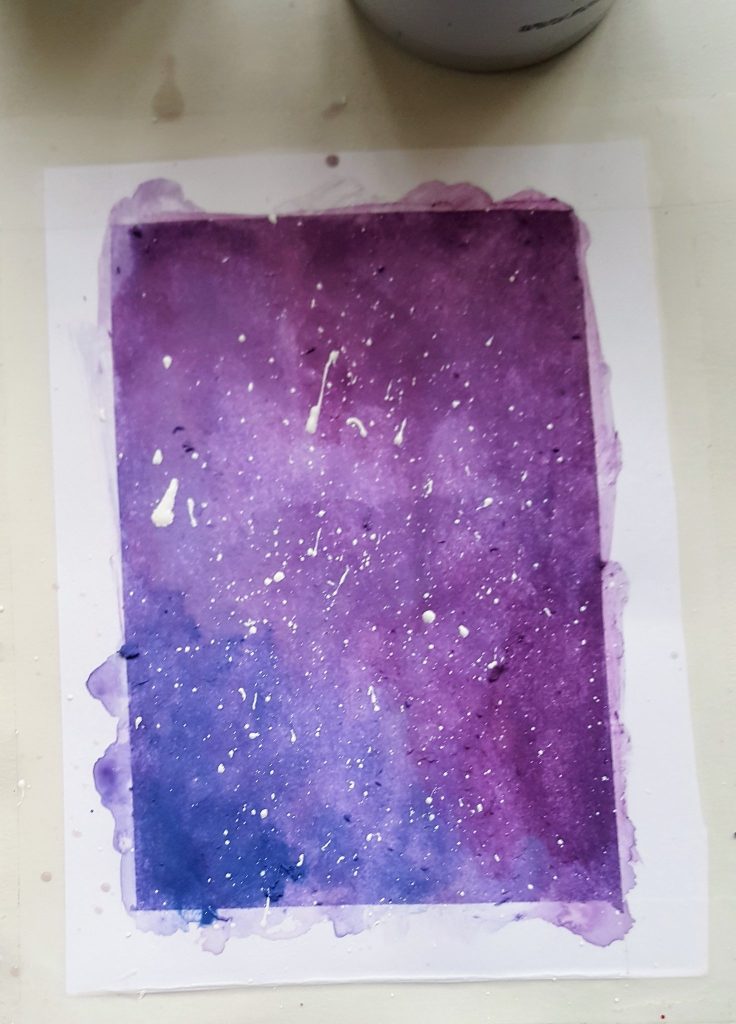
PANEL DESIGN THREE: I painted the panel with different shades of purple, adding a bit of water to the paint with my brush to make it easier to blend. Then I flicked white paint by tapping the paintbrush with my finger to make what looks (a little bit) like stars!
If I were to do this one for all of my panels I think I’d make them different shades of the night sky
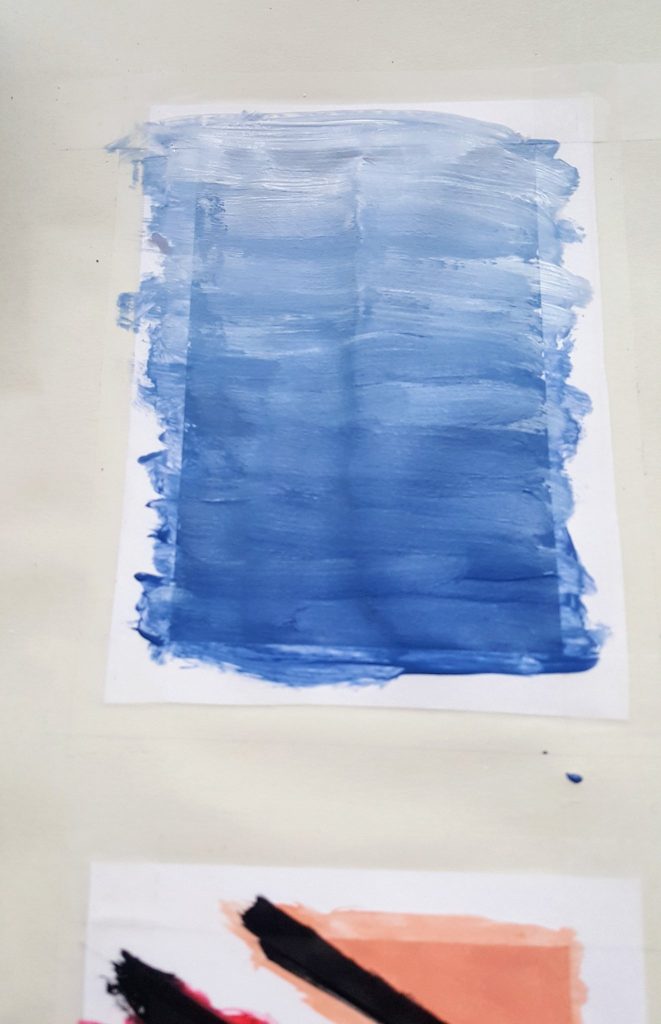
PANEL DESIGN FOUR: This one is my favourite but maybe a little more difficult. I began with a gradient from dark to light blue, bottom to the top of the panel.
It's fine if the brushstrokes are obvious- there's no pressure to make it realistic
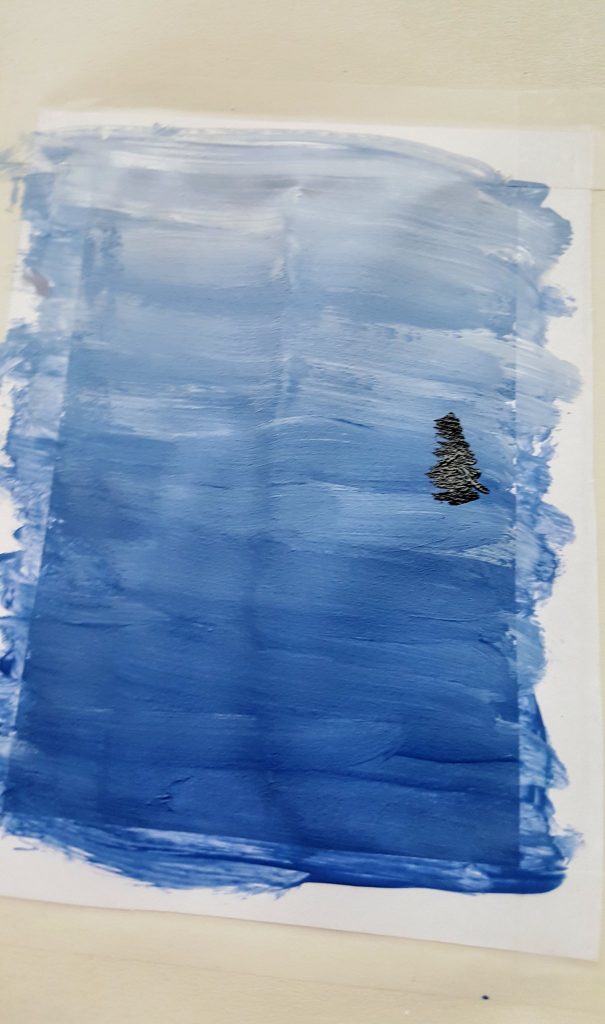
Next, I used black to create the silhouette of a treeline on the middle point of the gradient. I painted small pine trees by making little zig-zag branches jutting out from the vertical line of the trunk, and the rocky shore of the islands on the lake with little circle-like blobs. I’m not an art teacher okay, I’m trying.
My tiny lumpy tree silhouette on the horizon line of my panel
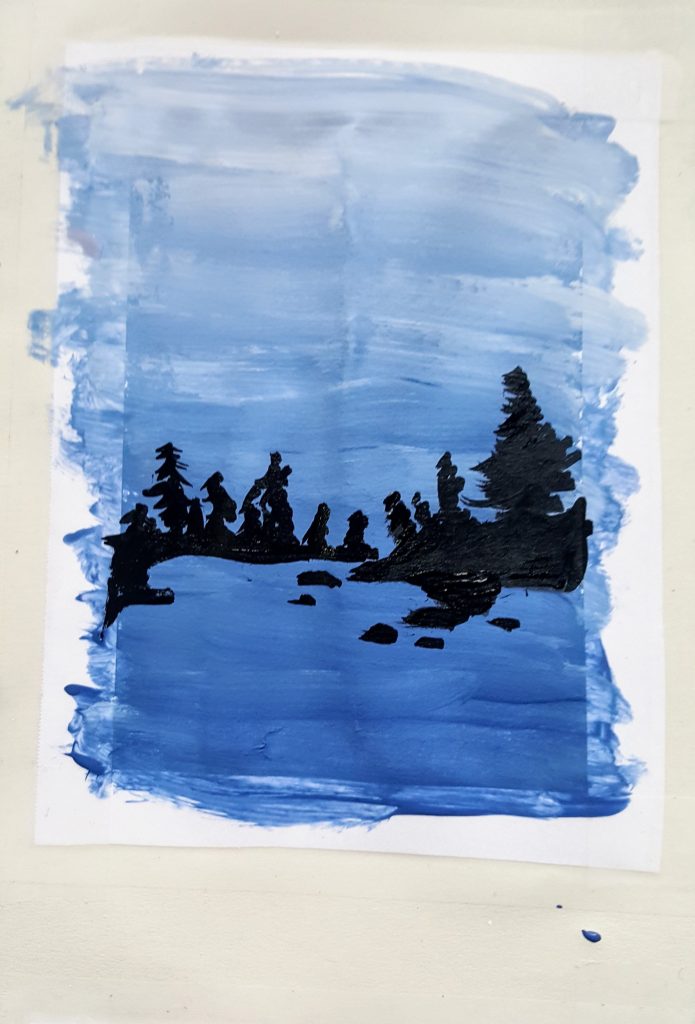
I made one of the islands larger to create dimension, and had the other one appear as if it were going behind the closer one.
Here's my completed lakeside-island landscape panel
This can also be done by just doing a consistent line of trees across the middle and it still looks great, and with different shades of blue!
AND FINALLY: once all of your paint has dried, slowly peel off the tape and you’re done! Now they can be put up on your wall!
Done! the tape covering the sides left a unifying white boarder. they're imperfect but thats what makes them great
Of course, these are all suggested designs. I would love to see how your panels turned out, tweet the @lifeatuoft twitter with a picture of your joyful art decals if you manage to find time in your busy schedule.
I hope art helps you find some inner peace as much as it does for me, and that all the things that bring you #JoyatUofT really shine this week 🙂
Join the conversation! Follow @UofTStudentLife on Facebook, Twitter and Instagram for chances to WIN some cozy prizes, and spread the joy at U of T using the hashtag #JoyAtUofT


0 comments on “Joyful room decorations -Painted Panels!”